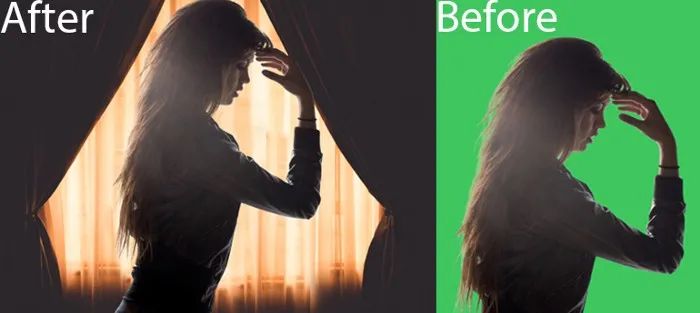
使用 Python 将绿屏背景替换成自定义图片
 发布日期:2022-12-26
 浏览量:18567
 263
+1

你有没有想过我们如何自己替换图像中的绿屏背景?
在这里,将教你如何使用 Python 和 OpenCV 替换具有绿屏背景的图像。
让我们进入正题,首先将拍摄两张图像作为我们程序的输入,一张是绿屏背景的图像,另一张是将设置成背景的图像。


带有绿屏背景的图像和要设置的背景图像
首先,你需要安装一些必需的库,例如 OpenCV 和 cvzone。
要安装这些库,只需打开命令提示符或终端并键入以下内容,然后按 Enter。
pip install opencv-python
pip install cvzone
安装库后,导入安装的库并读取这两个图像,如下所示,
# Importing libraries
import cv2
from cvzone.SelfiSegmentationModule import SelfiSegmentation
# Reading the green screen and background image
green_screen_img = cv2.imread("Green Screen Image Path")
bg_img = cv2.imread("Background Image Path")
两个图像应具有相同的尺寸(相同的宽度和高度)。使用shape属性检查尺寸(返回高度、宽度、通道)。如果两个图像的尺寸不同,则使用cv2.resize() 将这些图像的尺寸调整为相同的尺寸。
# Checking dimensions
print(green_screen_img.shape)
print(bg_img.shape)
# In my case both are having different dimension.
# So, I have to resize my images to same dimensions.
w, h = 640, 480
green_screen_img = cv2.resize(green_screen_img, (w, h))
bg_img = cv2.resize(bg_img, (w, h))
调整图像大小后,为SelfiSegmentation创建一个从cvzone.SelfiSegmentationModule导入的对象,然后从该对象调用一个函数removeBG(),该函数接受三个参数。
源图像背景图像/背景颜色阈值(默认 = 0.1)(可选)output_1 = segmentor.removeBG(green_screen_img, bg_img)
cv2.imshow("Output-1", output)
cv2.waitKey(0)

具有默认阈值 (0.1) 的输出图像
output_2 = segmentor.removeBG(green_screen_img, bg_img, threshold=0.4)
cv2.imshow("Output-2", output_2)
cv2.waitKey(0)

输出阈值为 0.4 的图像
注意:最大阈值可以是1。如果阈值设置为 1,则整个图像被背景图像占据,如下所示,
output_3 = segmentor.removeBG(green_screen_img, bg_img, threshold=1)
cv2.imshow("Output-3", output_3)
cv2.waitKey(0)

阈值为 1 的输出图像
你也可以在BGR(蓝色、绿色、红色)值中指定颜色,而不是将图像指定为背景,如下图所示,
# In my case, I am choosing Red color as background
# RED - (0, 0, 255)
output = segmentor.removeBG(green_screen_img, (0, 0, 255))
cv2.imshow("Output", output)
cv2.waitKey(0)

以红色为背景的输出图像
原文标题 : 使用 Python 将绿屏背景替换成自定义图片
上一篇 : 以全新视角看待机器视觉
下一篇:使用 Python 的铅笔素描图像


